API Documentation
Quick integration with Claude API platform, compatible with OpenAI format
Prerequisites
Before getting started, please ensure you have the following tools installed:
1. Install Node.js
Node.js is required to run Claude Code.
- Visit Node.js official website
- Download the LTS (Long Term Support) version (recommended)
- Run the installer and follow the prompts to complete installation
- After installation, open Terminal (Windows users: Command Prompt or PowerShell), enter the following command to verify:
node --version - If it displays a version number (e.g., v20.x.x), the installation was successful
2. Install VS Code (Optional but Recommended)
VS Code is a powerful code editor that makes using Claude Code more convenient.
- Visit VS Code official website
- Download the version for your operating system
- Run the installer and follow the prompts to complete installation
- When opening VS Code for the first time, you can choose a language pack if needed
3. Install Claude Code
There are two installation methods, choose one:
Method 1: Install via npm (Command Line Version)
Execute in terminal:
npm install -g @anthropic-ai/claude-codeAfter installation, type claude --version in terminal to verify successful installation.
Method 2: Install Extension in VS Code (Recommended)
- Open VS Code
- Click the Extensions icon in the left sidebar (or press
Ctrl+Shift+X/Cmd+Shift+X) - Type "Claude Code" in the search box
- Find the official Claude Code extension published by Anthropic
- Click the "Install" button
- After installation, the Claude icon will appear in the left sidebar
Quick Start
Step 1: Create API Key
- Log in to the Dashboard
- Go to API Keys page
- Click the "Create API Key" button
- Enter a key name (e.g., My Claude Code)
- Optional configuration:
- Allowed models whitelist (leave empty for no restrictions)
- Max tokens per request (leave empty for no limit)
- Expiration time (leave empty for never expires)
- After clicking "Create", immediately copy and save the complete API Key
Step 2: Configure Claude Code
There are two configuration methods, choose one:
Method 1: Command Line Configuration (Recommended)
Execute the following commands in terminal:
claude config set -g api-url https://www.agentstashlab.com/apiclaude config set -g api-key YOUR_API_KEYTip: The -g parameter means global configuration, all projects will use this config. To configure only for the current project, remove the -g parameter.
Method 2: Using cc-switch Tool
If you need to quickly switch between multiple API providers, we recommend using the cc-switch tool.
1. Download cc-switch
Download the latest cc-switch.exe file from GitHub Releases.
It's recommended to place cc-switch.exe in your system PATH for easy access from anywhere.
2. Add Platform Configuration
Double-click to run cc-switch.exe, select "Add Configuration":
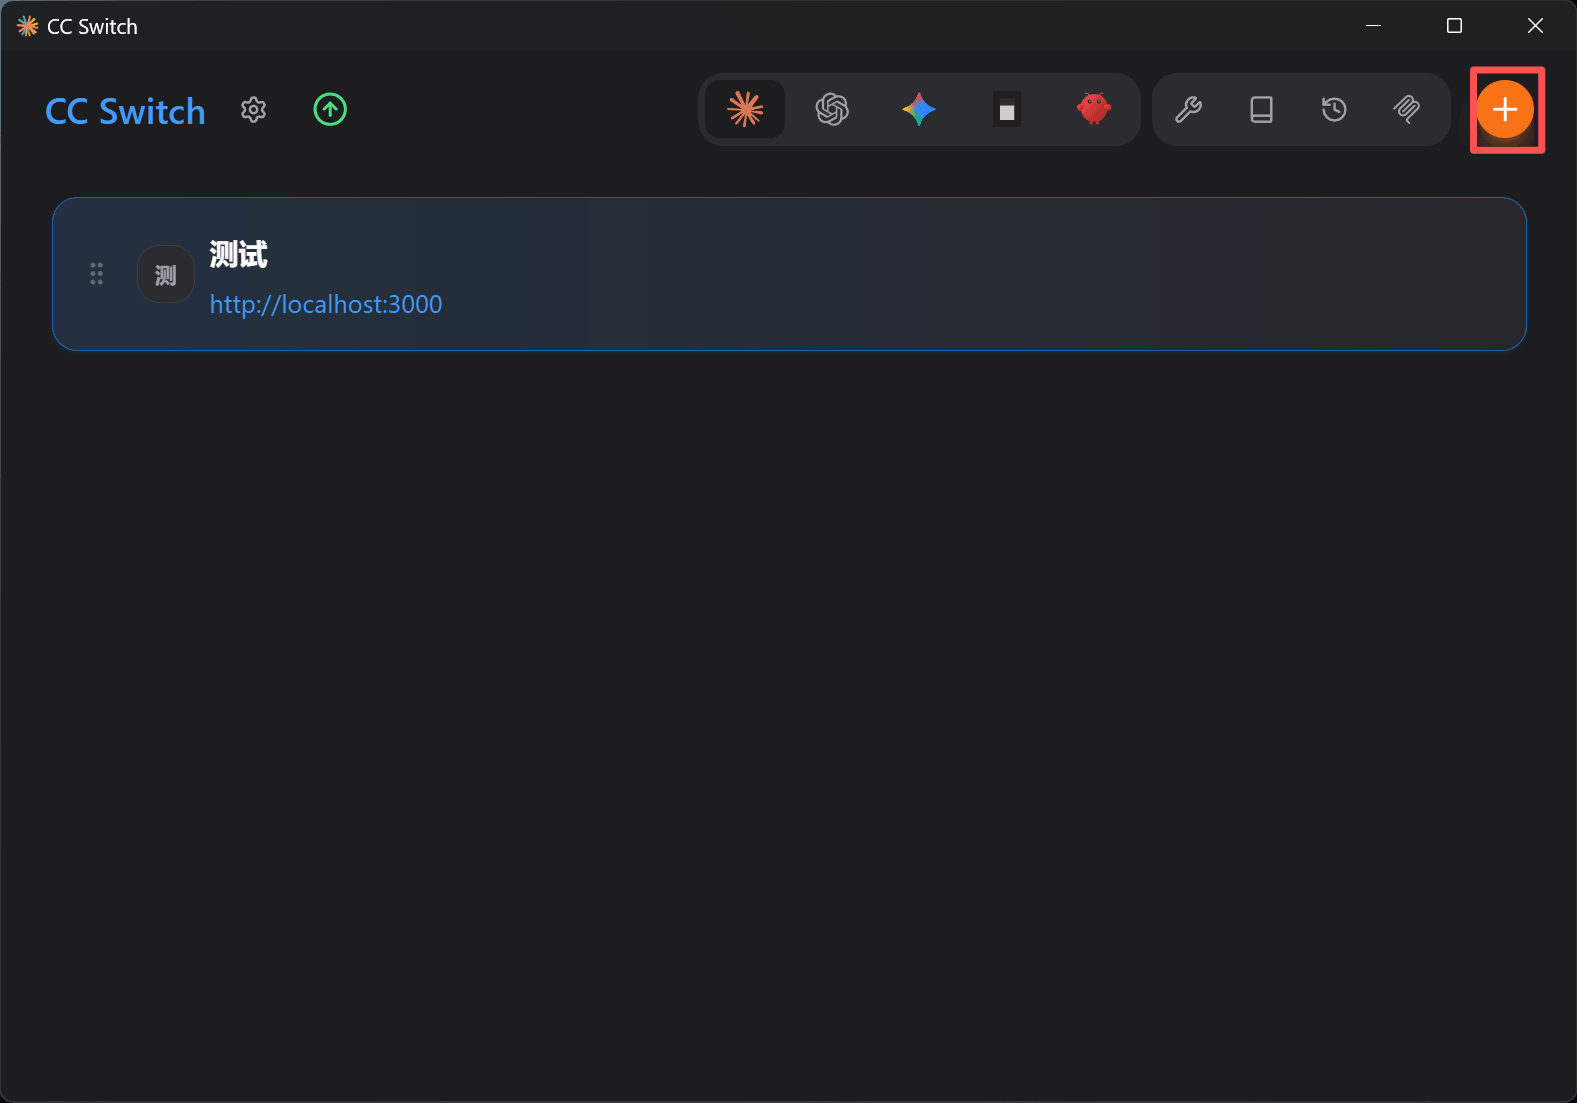
Click the plus icon to create a new configuration
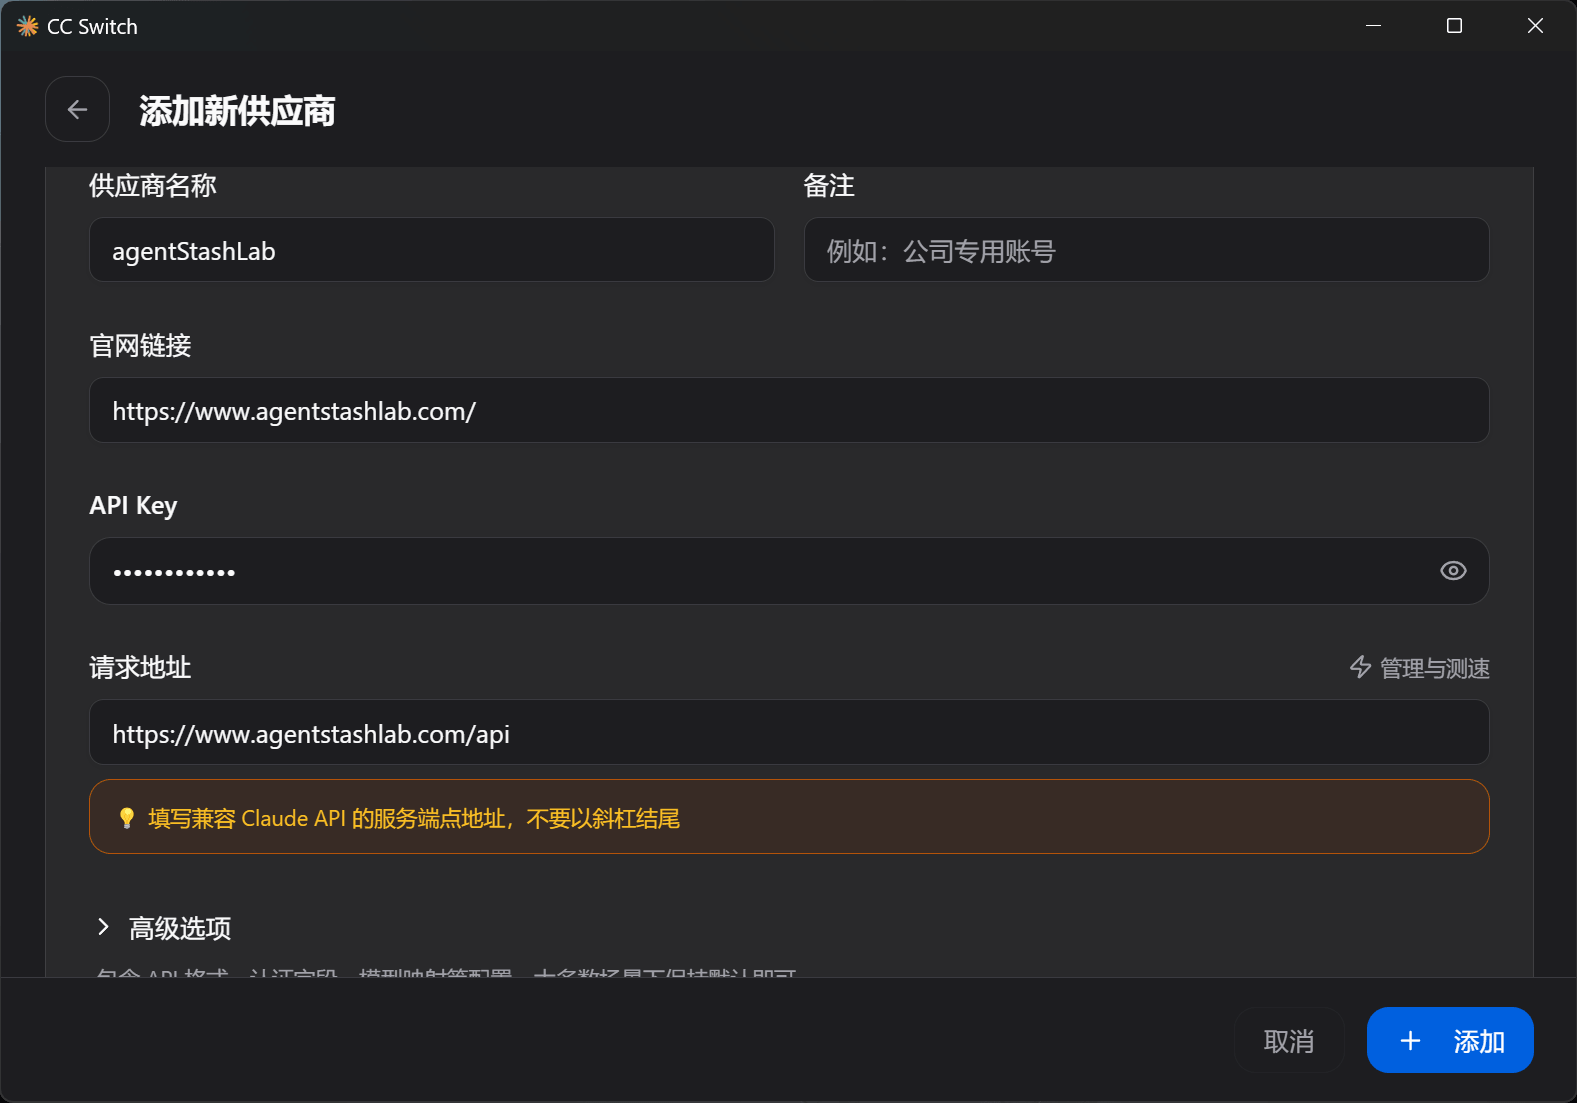
Enter configuration name (e.g., agentstashlab), API URL and API Key
Configuration Example:
- Configuration Name: agentstashlab
- API URL: https://www.agentstashlab.com/api
- API Key: sk-xxxxxxxxxxxxxxxxxxxxxxxxxxxxxxxx
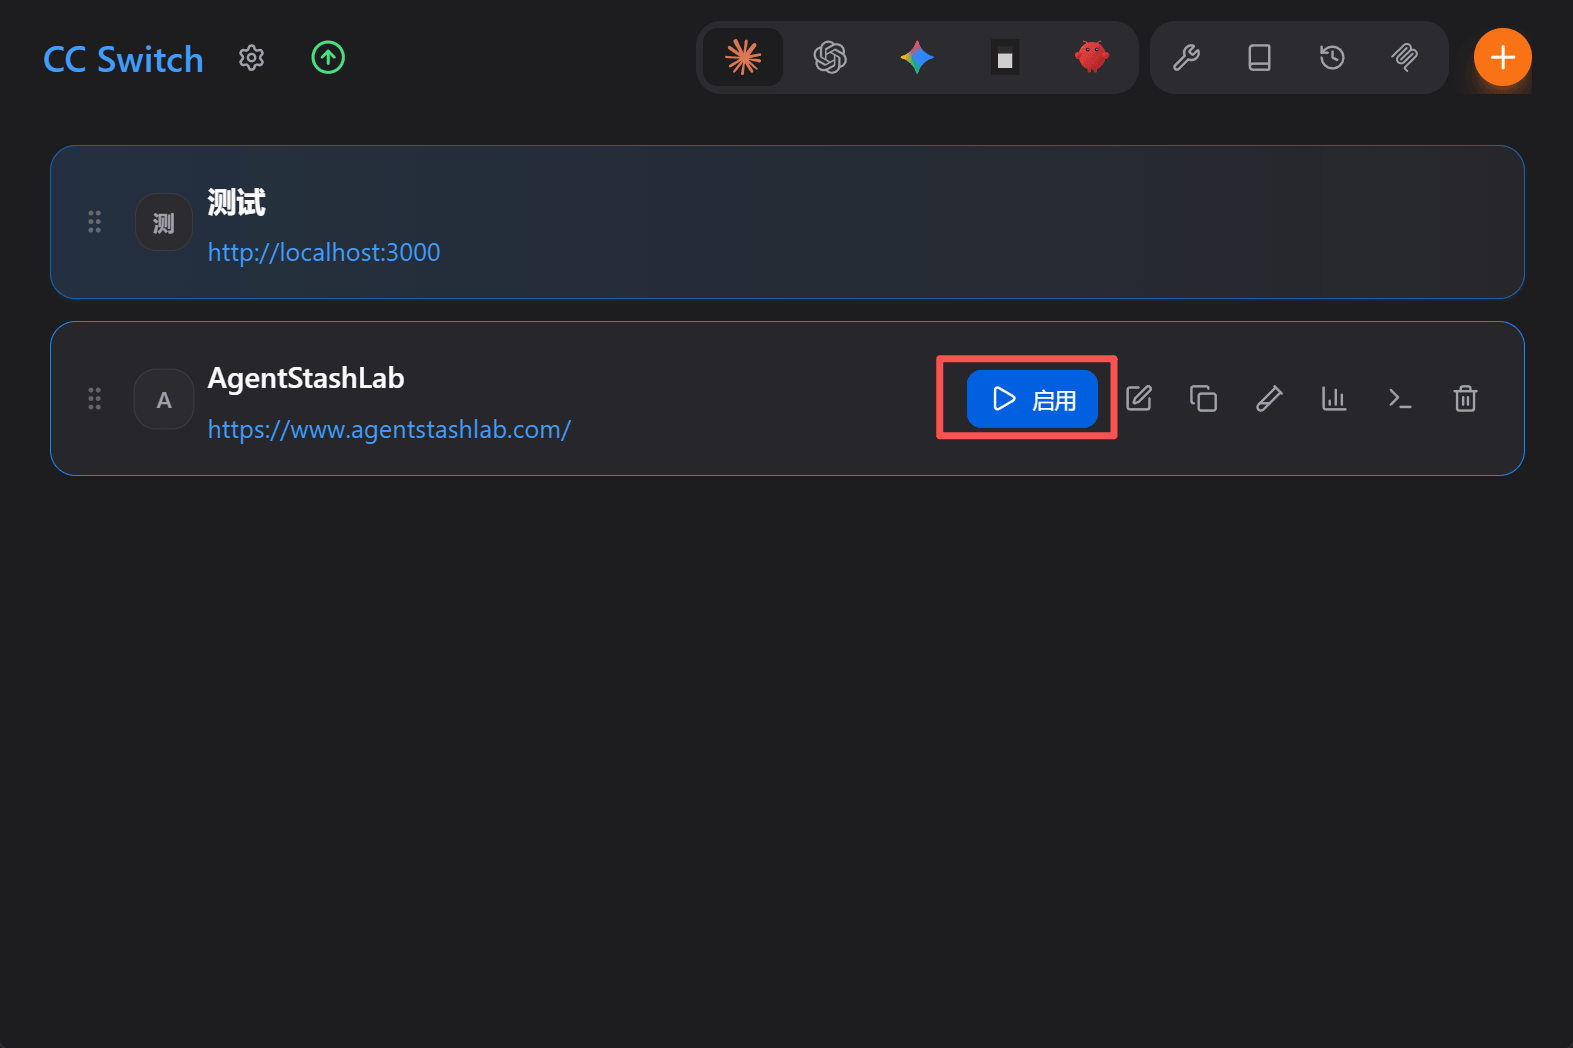
3. Switch to This Platform
Select agentstashlab from the configuration list and click the "Switch" button:
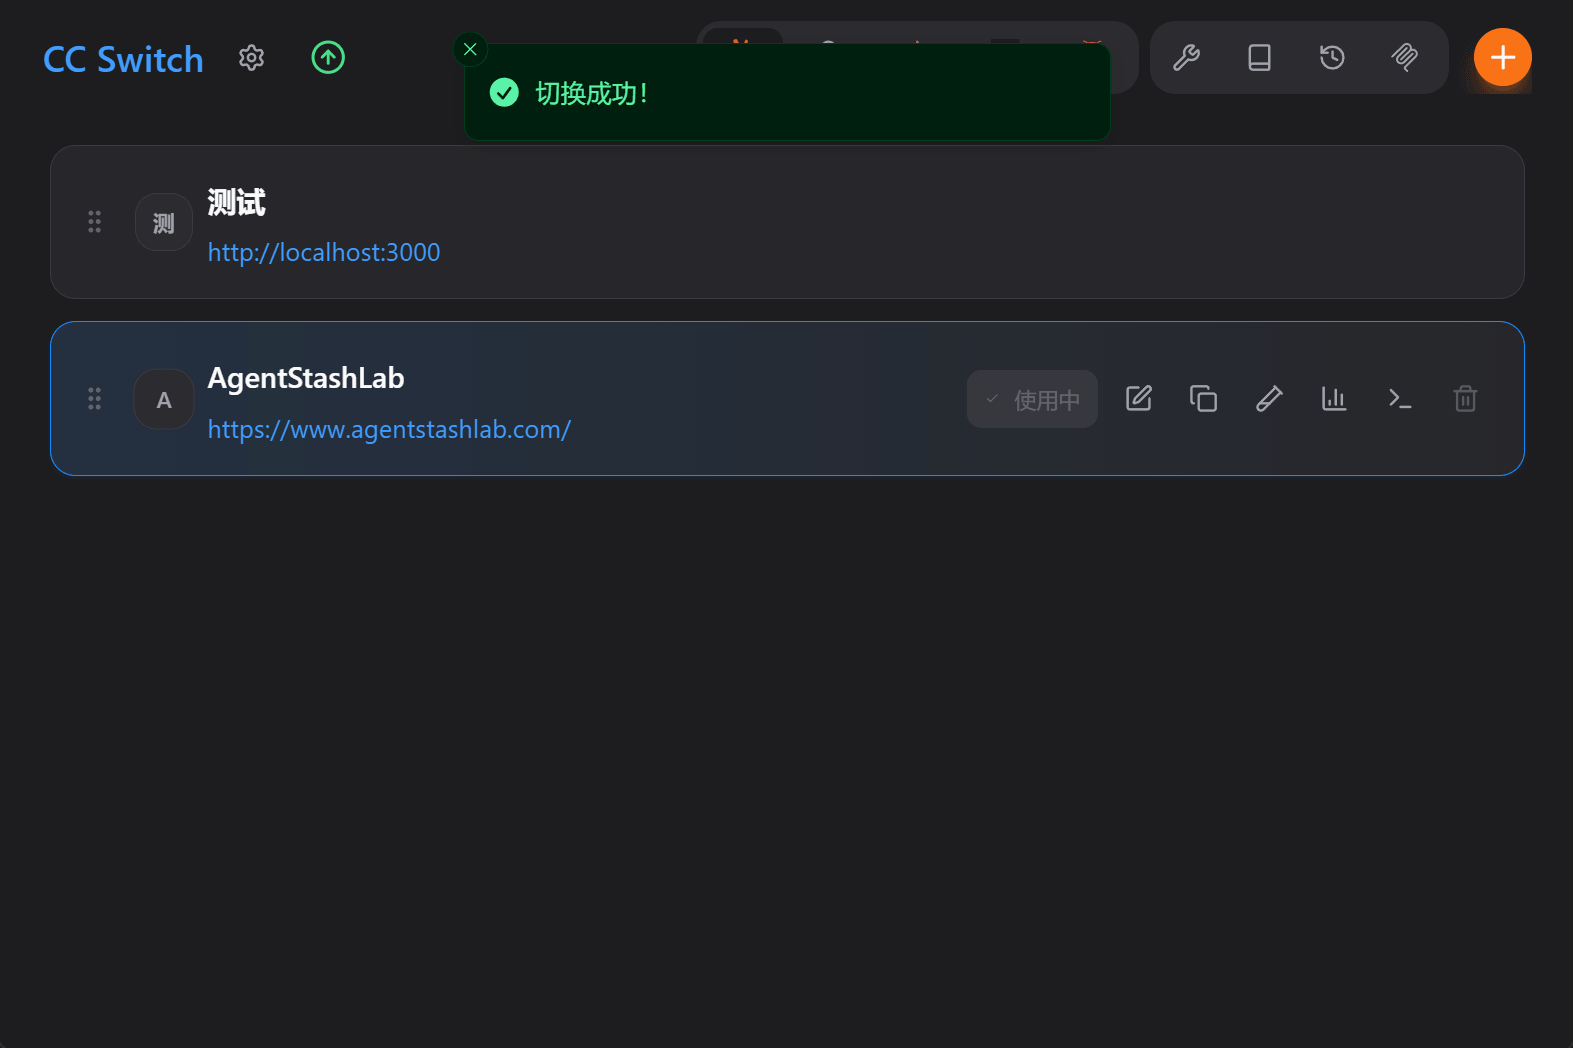
After successful switch, the current configuration will be shown as active
After switching successfully, Claude Code will automatically use this platform's configuration.
4. Verify Current Configuration
You can see the currently active configuration information on the main interface:
Shows the currently used API URL and key prefix
Step 3: Verify Configuration
After configuration, test in terminal:
claude "Hello, Claude!"If configured correctly, Claude will respond normally. You can also check request records on the Usage Details page.
Error Codes
| HTTP Status | Error Code | Description |
|---|---|---|
| 401 | INVALID_API_KEY | API Key is invalid or has been deleted |
| 401 | KEY_EXPIRED | API Key has expired |
| 402 | INSUFFICIENT_BALANCE | Insufficient account balance, please recharge |
| 400 | MODEL_NOT_ALLOWED | This key is not authorized to use this model |
| 503 | ALL_PROVIDERS_DOWN | All upstream providers are unavailable |
Frequently Asked Questions
Q: I'm a complete beginner, where should I start?
We recommend following this order:
1. Install Node.js (required)
2. Install VS Code (recommended)
3. Install Claude Code extension in VS Code
4. Register an account on this platform and add funds
5. Create an API Key
6. Configure Claude Code according to the documentation
7. Start using
Q: I don't know how to open Terminal/Command Line?
Windows users: Press Win + R, type cmd or powershell, press Enter.
Mac users: Press Cmd + Space, type Terminal, press Enter.
VS Code users: Press Ctrl + ` (backtick) in VS Code to open the integrated terminal.
Q: Getting "command not found" when running claude command?
This means Claude Code is not properly installed or not added to system PATH. Try:
1. Re-run the installation command: npm install -g @anthropic-ai/claude-code
2. Close and reopen your terminal
3. If it still doesn't work, we recommend using the VS Code extension version
Q: Getting "insufficient balance" error after configuration?
Please go to the Billing page to add funds to your account. This platform charges based on actual usage, we recommend starting with a small amount for testing.
Q: Can I use the same API Key on multiple computers?
Yes. One API Key can be used on multiple devices, but please keep your key secure and don't share it with others.
Q: How can I view my usage and costs?
After logging in, visit the Usage Details page to view detailed information and costs for each request.